In skateboarding, specific skills are nothing short of fundamental, and gripping your skateboard deck is undoubtedly one of them. The tactile connection between you and your board is a subtle but crucial factor that can make or break your skate session.
For example, imagine you’re cruising down the street, feeling the rush of the wind and the thrill of the ride, performing your favorite skating tricks. In that electrifying moment, the last thing you want to worry about is your feet slipping off the board. That’s where grip tape comes into play, and it’s more than just a cosmetic addition. The unsung hero, the unassuming layer on your deck, ensures your safety and propels your performance by providing much-needed traction.
Whether you’re a wide-eyed beginner taking your first steps on a skateboard or a seasoned pro looking to rekindle the bond with your deck, this comprehensive guide is your trusty companion. It’s your roadmap to mastering the art of gripping a skateboard.
In the following sections, we will unravel the secrets of proper grip application, step by step, leaving no room for uncertainty. So, let’s roll up those sleeves, grab your skateboard, and embark on this journey to ensure your ride is safe and defined by unrivaled control and style.
How to Grip Tape: Step-by-Step Guide
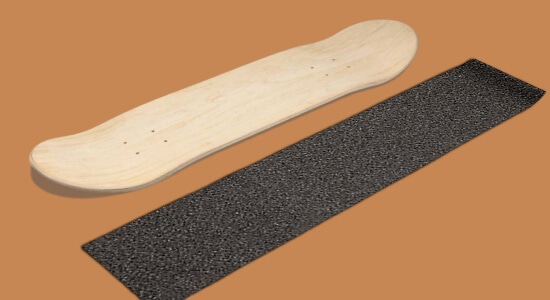
Before you begin the gripping process, gathering all the necessary materials is essential. Here’s a list of what you’ll need:
- Skateboard deck
- Grip tape
- File
- Razor blade
- Screwdriver
Ensure you have all these items readily available for a smooth and efficient gripping.
Step 1: Preparing the Grip Tape
The first step in gripping a skateboard is preparing the grip tape. Start by carefully peeling the grip tape from its backing paper. It’s essential to save the paper for later use. Once the grip tape is peeled off, ensure the sticky side faces up, ready to be applied to the skateboard deck.
Step 2: Applying the Grip Tape
Now that you have the grip tape ready, it’s time to apply it to the skateboard deck. Follow these steps:
- Carefully align the sticky side of the grip tape with the skateboard deck’s top surface, ensuring it covers the entire deck.
- Press down on the grip tape, starting from the center and working your way outwards. This will help ensure the grip tape adheres firmly to the deck and eliminates air bubbles.
- To remove any remaining air bubbles, place the peeled backing paper on top of the grip tape and apply pressure with your hand across the entire surface. This step will help achieve a smooth and bubble-free grip.
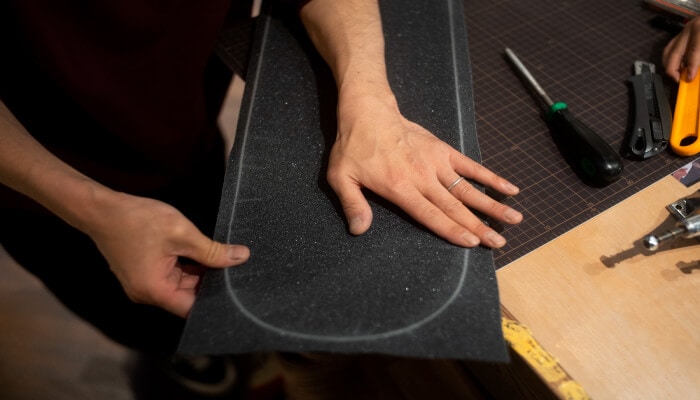
Step 3: Shaping and Filing the Grip Tape
With the grip tape adequately applied, it’s time to shape and file the edges for a clean and professional look. Follow these steps:
- Bend the ends of the grip tape to match the curvature of the skateboard deck.
- Using a file, carefully file the edge of the grip tape, following the outline of the skateboard deck. Hold the file at a slight angle as you work your way around the deck.
- The filing process helps create a smooth transition between the grip tape and the deck, ensuring a comfortable grip for your hands.
Step 4: Cutting the Grip Tape
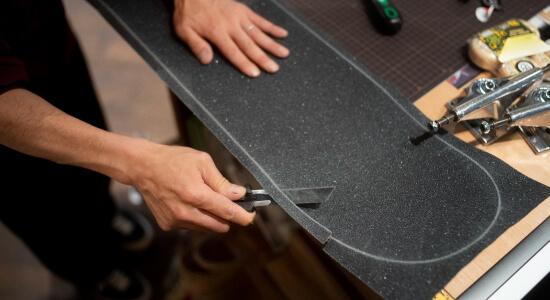
Now that the grip tape is shaped and filed, cutting the excess material is time. Follow these steps:
- Using a razor blade, carefully cut a small slit at each of the four pockets of the skateboard deck. These slits will serve as starting and ending points for your cuts.
- Starting from one of the slits, carefully follow the filed outline with the razor blade, cutting the grip tape along the edge of the deck. Take your time and use a slight angle to ensure a smooth and precise cut.
- As you cut, gently pull the excess grip tape away, gradually revealing the outline of the skateboard deck. Repeat this process for all four deck sides until the excess grip tape is completely removed.
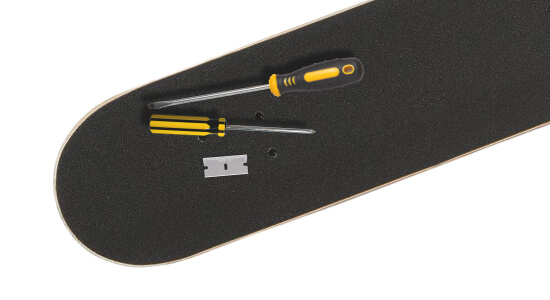
Step 5: Finishing Touches
Now that you have successfully cut out the grip tape, it’s time to add the finishing touches. Follow these steps:
- Take a piece of the excess grip tape cut off and use it as sandpaper. Use it to sand down the edges of the grip tape, removing any rough or excess pieces. This step will give your skateboard deck a clean and polished look.
- Using a screwdriver, poke holes through the grip tape to match the holes in your skateboard deck. The hardware will be attached to secure the trucks to the deck in these holes.
Step 6: Cleaning Up
After completing the gripping process, cleaning up any remaining debris is essential and ensuring everything is in order. Use a clean cloth or brush to remove any excess grip tape particles or dust from the deck. This will ensure a clean and professional finish. You can also read our “How to Clean Skateboard Guide” to learn the cleaning process in detail.
With your skateboard deck properly gripped, it’s time to test it out and enjoy the enhanced control and stability it provides. Take your skateboard for a ride and feel the difference the grip tape makes in your performance and confidence on the board. Practice your tricks, explore new terrain, and embrace the power of an adequately gripped skateboard.
Conclusion
Gripping a skateboard deck is an essential skill that every skateboarder should learn. Following the step-by-step process outlined in this guide, you can confidently grip or re-grip your skateboard deck, ensuring optimal performance and safety.
Remember to gather all the necessary materials, apply the grip tape precisely, shape and file the edges, cut out the excess material, and add the finishing touches. With an adequately gripped skateboard, you’ll be ready to take on any challenge and explore the exciting world of skateboarding.
So grab your deck, get your grip tape ready, and embark on an incredible skateboarding journey. Remember, practice makes perfect, and the more comfortable you become with gripping skateboards, the easier and quicker the process will be. Happy skateboarding!