Skateboarding is not just a fun pastime or an excellent sport; it’s a lifestyle. The thrill of cruising down the streets, executing tricks in the skatepark, or even just using the best skateboard as a mode of transportation is incomparable. As with any lifestyle, maintenance is critical; in skateboarding, maintaining your bearings is crucial.
This comprehensive guide delves into cleaning skateboard bearings, why it’s essential, how often to do it, and a step-by-step guide to help you do it yourself at home using everyday household items. We’ll also explore some common questions and tips to keep your bearings in top-notch condition.
Understanding Skateboard Bearings
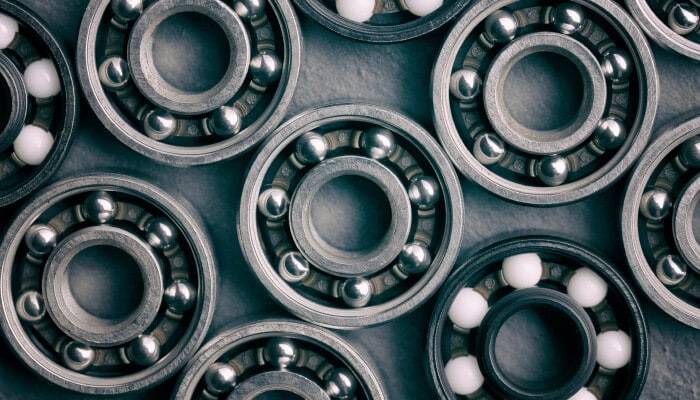
Before we dive into the cleaning process, let’s first understand what a skateboard bearing is. Skateboard bearings comprise an outer and inner race, a cage, and ball bearings. These components function together to enable your wheels to spin smoothly, allowing you to easily cruise, carve, or pull off various tricks.
However, these heroes often go unnoticed, tucked away inside the wheels and concealed by bearing shields and truck bolts. They endure all the dirt, dust, and grime that streets and skateparks throw at them, affecting the quality of your ride over time. This is why cleaning your skateboard bearings is crucial to skateboard maintenance.
What You’ll Need to Clean Your Bearings
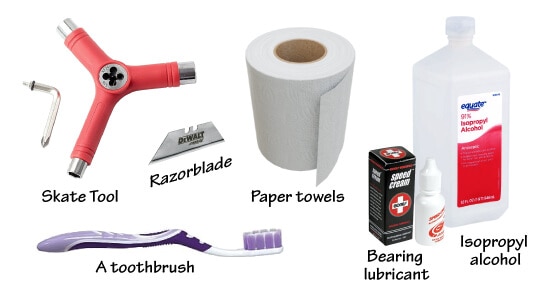
Possibly a single image with the materials needed or a photo collage with most of the equipment.
Cleaning your skateboard bearings doesn’t require any special or expensive tools. You can accomplish this task using everyday household items. Here’s what you’ll need:
- A flat surface (like a table, floor, or desk)
- A skate tool or wrench
- A Razorblade or safety pin
- Paper towels
- A disposable or ceramic cup
- Isopropyl alcohol or dish soap
- A toothbrush
- Bearing lubricant (optional)
- A towel (optional)
- A small container (optional)
Step-by-Step Guide to Cleaning Skateboard Bearings
Now that we’ve covered the whys and whens of cleaning skateboard bearings, let’s get down to the how. Here is a detailed, step-by-step guide on how to clean skateboard bearings at home.
Step 1: Prepare Your Workspace
Choosing a suitable workspace is the first step in the bearing cleaning process. This could be a flat workbench in your garage, backyard, or floor. Lay a towel down to catch any dirt or oil, and keep plenty of paper towels at hand. If you’re cleaning your bearings indoors, take some precautions to avoid making a mess.
Step 2: Remove the Wheels and Bearings
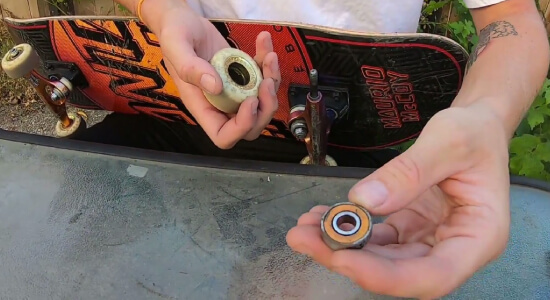
The next step involves removing the wheels and bearings from your skateboard. Use your skate tool or wrench to remove the bolts from your wheels. To remove the bearings, position the wheel on the mouth of the bearing at a 45-degree angle and use your body weight to leverage the bearing out of the wheel. Repeat this process until all eight bearings have been removed.
Step 3: Clean the Bearings
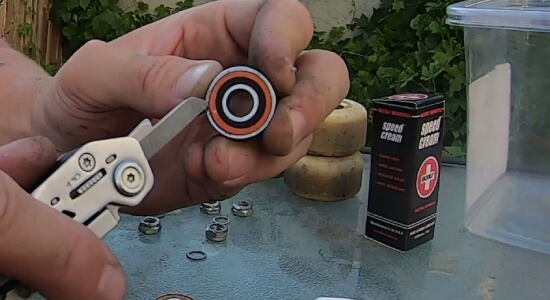
Now that your bearings are removed, it’s time to clean them. Start by removing the bearing shields using a razor blade or safety pin. This will expose the ball bearings inside, where the most damaging debris resides. Once the shields are off, soak the bearings in a cup of isopropyl alcohol or warm, soapy water for about 30 minutes, swirling them around every few minutes.
Step 4: Scrub Off the Dirt
After soaking, use a toothbrush to scrub off any remaining dirt or grime. Be sure to clean the ball bearings and all other parts of the bearing thoroughly. Once you’ve scrubbed all the grime off, rinse the bearings thoroughly in clean water.
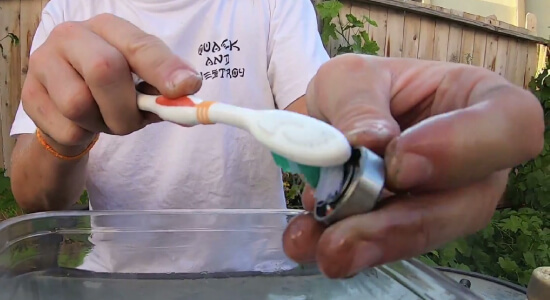
Step 5: Dry and Lubricate Bearings
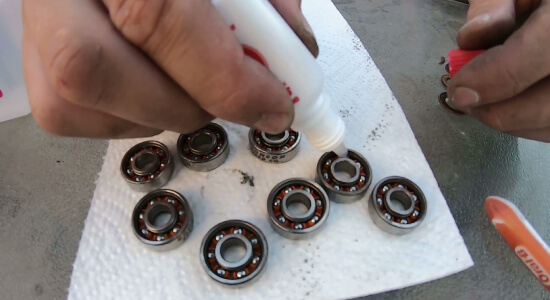
Once the bearings are clean, it’s crucial to dry them thoroughly to prevent rusting. You can tap them face down on a dry rag or paper towel or use a hairdryer or compressed air. Once dry, apply a light layer of bearing lubricant or speed cream to keep them spinning smoothly and reduce the risk of rusting.
Step 6: Reassemble Your Skateboard
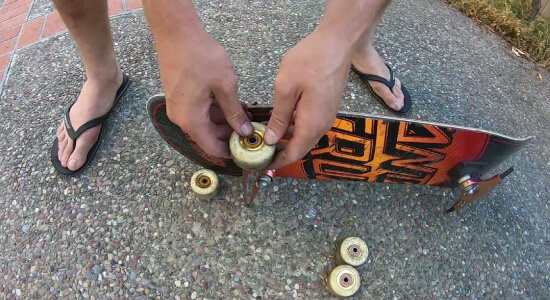
Now that your bearings are clean and lubricated, it’s time to assemble your skateboard. Place the bearing shields back on, then mount the bearings back onto the wheels. Lastly, attach the wheels to your skateboard, and you’re all set to roll!
Why Should You Clean Your Bearings?
Your skateboard bearings are constantly exposed to dirt and dust, which can accumulate inside them over time. This build-up of dirt and grime can cause your bearings to slow down or seize completely, making your skateboard roll sluggishly and turning your once enjoyable ride into a chore.
Regularly cleaning your skateboard bearings improves the quality of your ride and extends the life of the bearings, saving you time and money in the long run. Furthermore, cleaning your bearings allows you to inspect them for any signs of damage or wear, further enhancing the maintenance of your skateboard.
How Often Should You Clean Your Bearings?
The frequency with which you should clean your skateboard bearings depends on several factors, including how often your skateboard, the conditions you skate in, and the type of bearings you have. Nevertheless, a good rule of thumb is to clean your bearings if you notice any of the following signs:
- Your wheels are not spinning smoothly: If your skateboard’s wheels are not spinning as smoothly as they should be or are coming to a halt quickly, it may be due to dirty bearings.
- You hear unusual sounds: Bearings laden with dirt and grime may make squeaky or grinding noises. If your bearings sound more like a choir of mice than smooth operators, it’s probably time for a cleaning session.
- You’ve been skating in dirt-prone areas: If you’ve recently been skating in sandy or dusty areas or near the ocean, the chances are high that your bearings have collected some unwanted dirt and need cleaning.
Final Thoughts
Cleaning your skateboard bearings might seem like a hassle, but it’s a small price to pay for a smoother, more enjoyable ride. This simple maintenance task improves your skateboarding experience and extends the life of your bearings, saving you money in the long run. So why not give your skateboard some love and clean those bearings today? Happy skating!